Creating a vibrant and thriving green wall in your outdoor space is a rewarding endeavor that can enhance the beauty and privacy of your garden. With the right approach, this living fence can flourish and become a stunning focal point, providing not just aesthetics but also a sense of tranquility. My journey in nurturing this botanical wonder has been both enlightening and fulfilling, allowing me to discover the secrets to achieving a lush and healthy environment.
Embracing the unique characteristics of this remarkable plant is essential. From understanding its growth patterns to recognizing its specific needs, every aspect contributes to the overall vitality of this verdant addition. I’ve learned that attention to detail, such as soil quality and sunlight exposure, plays a crucial role in its development. By fostering these conditions, I’ve witnessed firsthand how they can transform a simple shrub into a magnificent living screen.

Moreover, the process of nurturing this greenery is not just about routine tasks; it’s also about forming a connection with nature. Observing the changes throughout the seasons has deepened my appreciation for its resilience and beauty. Through diligent observation and gentle intervention, I’ve been able to cultivate a robust structure that not only thrives but also adapts to its surroundings, creating a harmonious blend of beauty and functionality.
Optimal Soil Conditions for Growth
Creating the right environment for plant development is crucial for achieving a lush and vibrant landscape. The foundation of successful growth lies in understanding the specific needs of the plants involved. In this section, I will share essential insights into the soil characteristics that promote robust growth and overall health.
First and foremost, ensuring proper drainage is vital. Soil that retains too much water can lead to root rot and other detrimental conditions. I prefer using a well-draining mix that includes organic matter, which not only facilitates drainage but also enriches the soil with nutrients. A combination of compost, peat moss, and perlite works wonders in achieving this balance.
Next, attention must be given to soil pH levels. Most plants thrive in a slightly acidic to neutral range, typically between 6.0 and 7.0. Regular testing of the soil can help me determine if any adjustments are necessary. If the pH is too high, I might add sulfur or organic matter to lower it, while lime can be used to increase pH if it’s too low.
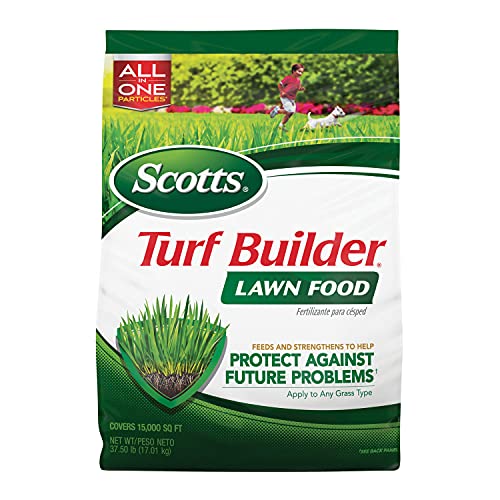
Nutrient availability is another key factor. I always ensure that the soil is rich in essential nutrients such as nitrogen, phosphorus, and potassium. Incorporating slow-release fertilizers or organic options like bone meal and fish emulsion can provide a steady supply of these vital elements, promoting vigorous growth over time.
Lastly, regular mulching is a practice I find beneficial. Applying a layer of organic mulch not only helps retain moisture but also suppresses weeds and slowly adds nutrients back into the soil as it decomposes. This simple technique can make a significant difference in maintaining optimal conditions for sustained growth.
Pest Management Strategies
Maintaining a vibrant and thriving green barrier can sometimes be challenging due to the presence of unwanted pests. My experience has taught me that early detection and intervention are key to preventing infestations from damaging the plants. By implementing a proactive approach, I can ensure that my foliage remains healthy and visually appealing.
Regular inspections are essential. I make it a habit to check the leaves and stems for any signs of pests, such as discoloration, webbing, or visible insects. The sooner I spot any issues, the easier it is to address them. Additionally, I often use a magnifying glass to examine the undersides of the leaves, as many pests tend to hide there.
In my gardening routine, I find that introducing beneficial insects can significantly reduce pest populations. Ladybugs and lacewings are excellent allies, as they feed on aphids and other harmful insects. I often create an inviting environment for these helpful critters by planting a variety of flowering plants nearby, which provide them with nectar and shelter.
When it comes to chemical interventions, I prefer organic solutions. Neem oil and insecticidal soap have proven effective in my experience. I apply these treatments during the early morning or late evening to avoid harming beneficial insects. Following the manufacturer’s directions ensures that I use these products safely and effectively.
Another technique I utilize is the practice of companion planting. By placing certain plants together, I can deter pests naturally. For example, marigolds are known for their ability to repel nematodes and other unwanted insects, which can be beneficial when planted alongside my green barriers.
Lastly, maintaining optimal growing conditions greatly reduces stress on the plants, making them less susceptible to infestations. I ensure that they receive adequate sunlight, water, and nutrients, which strengthens their natural defenses. By focusing on these aspects, I can foster a resilient environment that minimizes pest-related problems.
Essential Watering Techniques
Maintaining the right moisture levels is crucial for the well-being of any plant. I’ve discovered that understanding the specific watering needs can make a significant difference in promoting robust growth and vibrant foliage. Proper hydration not only supports the plant’s health but also enhances its resilience against diseases and pests.
First and foremost, it’s important to assess the moisture requirements based on environmental factors such as temperature, humidity, and soil composition. I always recommend checking the soil regularly; sticking your finger about an inch deep can help determine if it’s time for a drink. If the soil feels dry, it’s a signal to provide water.
When it comes to watering, I find that deep and infrequent irrigation is more beneficial than shallow, frequent applications. This technique encourages roots to grow deeper in search of moisture, resulting in a stronger and more drought-resistant plant. I usually aim to saturate the soil thoroughly, allowing excess water to drain out of the bottom of the pot or planting area.
Additionally, the time of day for watering plays a significant role. I prefer to water in the early morning or late afternoon when the temperatures are cooler. This practice minimizes evaporation and ensures that the plant can absorb the moisture effectively before the heat of the day sets in.
Furthermore, I’ve learned that using mulch can help retain soil moisture. Applying a layer of organic mulch around the base can reduce evaporation and regulate soil temperature, benefiting the root system immensely. It’s a simple yet effective method that I incorporate regularly.
Lastly, I always keep an eye out for signs of overwatering or underwatering. Yellowing leaves may indicate too much moisture, while wilting can signal a lack of it. Adjusting my watering schedule based on these visual cues has proven invaluable in maintaining a healthy and thriving plant.
Essential Watering Techniques
Maintaining the right moisture level in the soil is crucial for the health and vitality of my plants. A well-thought-out watering routine can greatly influence their growth and overall appearance. Over time, I have learned a few techniques that ensure my greenery thrives without the risk of over or under-watering.
- Understanding the Needs: Different species have varying water requirements. I always observe my plants closely, noting how quickly the soil dries out and adjusting my watering schedule accordingly.
- Soil Moisture Checks: Before watering, I stick my finger into the soil up to the second knuckle. If it feels dry at that depth, it’s time to water. This simple test helps me avoid unnecessary watering.
- Time of Day: I prefer watering in the early morning or late afternoon. This minimizes evaporation and allows the roots to absorb moisture effectively.
In addition to these techniques, I also pay attention to the weather. During hot spells, I may need to increase the frequency of my watering sessions, while rainy periods allow me to scale back.
- Use of Mulch: Applying a layer of mulch around the base of my plants helps retain moisture in the soil, reducing the need for frequent watering.
- Watering Methods: I have found that deep watering is more effective than frequent shallow watering. Using a soaker hose or drip irrigation system allows water to penetrate deeper into the soil, encouraging root growth.
- Signs of Stress: I watch for signs of wilting or yellowing leaves, which can indicate that the plants are not getting enough moisture. Prompt action can prevent further issues.
By implementing these techniques, I have seen a significant improvement in the health and resilience of my plants. It’s all about finding the right balance and being attentive to their needs.
FAQ
What is the best way to water a clusia hedge?
Watering a clusia hedge requires a balance. These plants prefer well-drained soil but also need consistent moisture, especially during dry spells. It’s best to water deeply once a week, allowing the soil to dry slightly between watering sessions. In hotter months, you might need to increase the frequency. Always check the top inch of the soil; if it’s dry, it’s time to water. Avoid overwatering, as clusia can suffer from root rot if left in soggy conditions.
How often should I fertilize my clusia hedge, and what type of fertilizer is recommended?
Fertilizing a clusia hedge is important for promoting healthy growth. It is generally recommended to fertilize twice a year, in spring and late summer, using a balanced slow-release fertilizer. Look for a formula with equal parts nitrogen, phosphorus, and potassium (like a 10-10-10). This will provide the necessary nutrients for robust growth and vibrant foliage. If you notice poor growth or yellowing leaves, you might consider a fertilizer higher in nitrogen during the growing season to boost leaf development.
What are the common pests and diseases that affect clusia hedges, and how can I manage them?
Clusia hedges can be susceptible to several pests, including mealybugs and aphids, which may cause leaf damage and stunted growth. Regularly inspecting your plants can help you catch these pests early. If you notice an infestation, you can treat it with insecticidal soap or neem oil, which are effective and eco-friendly options. As for diseases, clusia is relatively resistant, but overwatering can lead to root rot. To manage this, ensure good drainage and avoid waterlogging the soil. Regular pruning to improve air circulation can also help prevent fungal issues.

How do I prune my clusia hedge for optimal growth?
Pruning is essential for maintaining the shape and health of your clusia hedge. The best time to prune is in late winter or early spring before new growth begins. Start by removing any dead or damaged branches. Then, shape the hedge by trimming back the sides and top to encourage bushier growth. Aim to create a tapered shape, wider at the base and narrower at the top, to allow sunlight to reach all parts of the plant. Regular trimming every few months will keep your hedge dense and promote new growth, resulting in a lush, vibrant appearance.
Can clusia hedges tolerate cold temperatures, or do they need protection during winter?
Clusia hedges are generally hardy in USDA zones 10-11 and do not tolerate freezing temperatures. If you live in a region with colder winters, it’s crucial to protect your hedge from frost. You can cover them with frost cloth or burlap during extreme cold snaps. Additionally, mulching around the base can help insulate the roots. If you expect a particularly harsh winter, consider moving young plants indoors or to a more sheltered location. Monitoring local weather forecasts during the winter months will help you take appropriate measures to protect your hedge.